Friday, March 4, 2011

Sick with the Flu

My project was to begin March 1, but alas, I've been struck with the flu. As I take my modern day medicines, I can't help but to wonder how they would've suffered with such ailments in the 1940's! Of course when I wonder such things, I turn to Google! It was actually in the 1940's when they came up with a crude vaccine to help prevent the flu but it wasn't until the 60's that the vaccination was truly effective. The 1940's era was also famous for public advertisement posters. Here is one that encourages people to cover up when they sneeze... and above all else~ NO SPITTING!


I'd love to see more posters like this in today's modern world. You'd think that we wouldn't need to be told not to spit in public, but just a couple of weeks ago (pre-flu!) I saw a woman (no less!) outside a strip mall who leaned over a rail and spit! Gross!! How unlady like!! Not that it's ever pleasant to see a man spit, but to see a woman do it was just somehow worse in my eyes. I had never thought before that spitting helps spread disease, but I can surely see how that would happen! I feel for the person that walks by and accidentally steps in it (bleah!) and then it's on their shoe, then on the carpet of the car, if she puts her purse or something down, germs can attach to that, you pick it up, and before you know it, the germs are on your hand! Wow... Germaphobia? Maybe... but that's how things spread and we need to be conscious of how our actions can affect others.

While working on recouping from this sickness, I've had a chance to read up on blogs and my housekeeping books. One of the housekeeping books I am using is "America's Housekeeping Book" from 1945 and I have also come across the blog "Destination 1940" where she is using the same manual to revisit 1940. It's nice to read and gather someone else's interpretation of the manual. I know that by reading her blog, some things just clicked with me, especially with the daily morning schedule. So I'm so pleased to have found her blog and wanted to share it!

Another great find from the previous blog was a link to a complete radio broadcast day from 1939. It is so interesting to listen too! Here is the link: http://www.archive.org/details/CompleteBroadcastDay

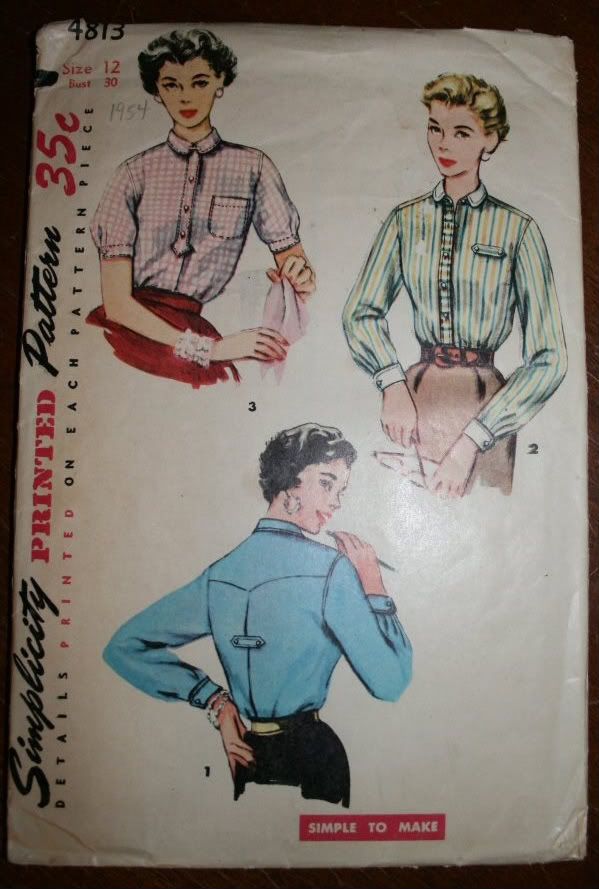
I am pleased to say that yesterday I felt well enough to cut out the pattern for the button down shirt I will be making. I chose this pattern for various reasons. First, I'd like to have a casual, work around the house button down blouse, and next, it is a fairly detailed blouse, so I figure if I can tackle the level of difficulty in this blouse, everything else will be easy peasy! It's going to be a pink and white check shirt, and I'm thinking I'd love to make a matching navy high waisted skirt. I'll keep you posted on how it comes along!

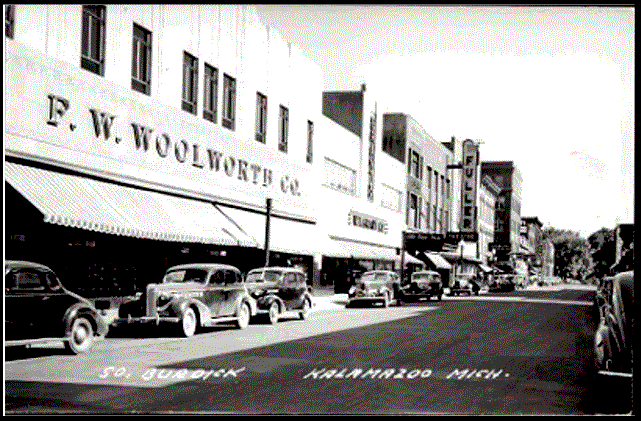
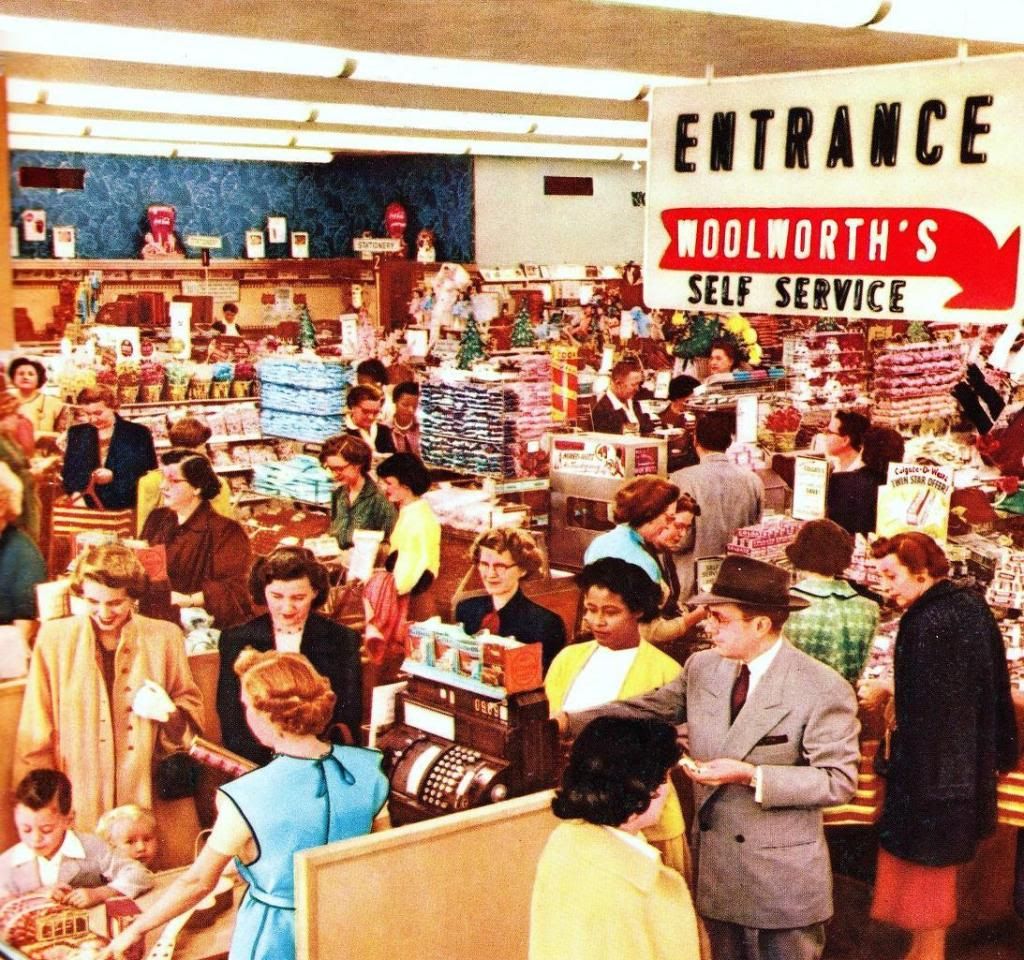
I wanted to make a round cake the other day, but I realized I didn't have any round cake pans. In my modern day mind, my first thought was "guess I can get some at Wal-Mart", but then I began to think... where would the 1940 me buy cake pans at? What was really scary is, I couldn't remember where I would have bought this at before Wal-Mart! I mean Wal-Mart's have been around since the 70's, but where I grew up it wasn't until the late 80's-early 90's that Wal-Mart arrived in our community. Before then, K-Mart was the big box store of choice. So, what was the big box store in the 1940's? F.W. Woolworth!


Woolworth was opened in 1878, and in 1979 was considered to be the world's largest department store. Woolworth's were eventually replaced by KMarts, Targets, and Wal-Marts. In fact, Wal-Mart purchased many of the Woolworth's in Canada. Now, the only company Woolworth still owns is Foot Locker.


Wednesday, February 9, 2011

My Victory Garden


Ah, I just got the latest Martha Stewart Living magazine and in this month's issue is all about gardening! In those big, glossy pages I see yummy fruits and veggies that I am so anxious to try my hand at this year! Lately the word "gardening" is associated with being green... save the planet and all that kind of stuff, but our grandparents and great-grandparents were gardening way before green was "in" and it was done FOR FOOD! It wasn't done as a hobby, but rather a necessity! You couldn't just run to the market and buy whatever you wanted, whenever you wanted! Check out this video....


My gardening methods are going to follow my approach of "vintage living in a modern world." I would like to have a very 1940's type garden in the sense of the types of heirloom seeds I use, but certainly not in the area of pesticides. I studied up on the approach of pest control and well, a 1942 "Basic Horticulture" book recommends that one use arsenate of lead to kill troublesome pests. Yeah, lead doesn't sound good to me either, but even if someone tried to be authentic and use it, they couldn't because it was banned as a pesticide by the US in 1988... besides it's known to be cancerous, and generally... not a good idea to use! ;) The 1940's-50's is when chemical agents began to be used not only by the professional farmer, but by home gardeners. Studies showed that household growers were actually using more of the chemicals than the professional farmers! Many hybrid plants and seeds began to "sprout" up. (sorry for the pun, lol!) At an age when they needed a quick harvest, science evolved and produced seeds to fit the need. (Although many times taste is greatly affected!) Previous generations spent the time collecting seeds from their own gardens to use again for the next year's garden, and even had seed swap parties! (sounds fun!!) As time went on, many gardeners decided not to collect seeds and rather just purchase the seeds from the garden store. As a result, many seed varieties are near extinct. Seed Savers is an online non-profit resource where you can purchase heirloom seeds! 


Here is another interesting video that shows how gardening was in the 1940's:


The first step to any successful Victory Garden is planning! Don't be like dad and grandpa, and have a plan in your head! Any good Victory Garden needs to be planned out on paper! :)


There is a lot to think about when starting a garden, and the first thing I think about is soil. That is because I live outside of Atlanta, GA and our soil is red clay. While I could opt to have the soil tested to see whether or not lime or gypsum would help treat the soil, I've opted for keeping things simple. Raised beds. By building raised beds I can add in the type of soil that will best for growing fruits and veggies. Not to mention save me many frustrating hours trying to dig up rock hard land! 


Raised beds can be made of different materials... rocks, landscape stones, cement block, pine board (which will last 2-3 years) or cedar/redwood (which will last 5yr.+). I'm not sure yet how I'm going to design the beds as I have been looking at so many beautiful layouts of raised beds.


I'm also aware that we have rabbits, deer, snakes and other critters that are anxiously awaiting me to plant a garden! So I'll have to design a barrier to prevent them from being able to eat all of my harvest! Our subdivision was built in a fairly rural area and once you exit, you see homes that have sheep, cattle, horses, etc. Well outside our subdivision is a good sized garden area and an elderly lady tends to it every year. Not with big power equipment, but rather with simple garden tools. I've watched her every year plant new crops and she really is an inspiration to me! Her garden is right off the road and she uses wire to keep the deer and other animals at bay. Apparently it works, and I might have to do that very thing!


Searching out seeds has been a slow work in progress. Here are a few great sites to check out:


A List of Lost Victory Garden Seeds


The Victory Seeds Company When you click on the description of the fruit/veggie seed it will tell you when it was produced.


Seed Savers They also sell transplants of tomato's, peppers, and ground cherries


A couple of other things to keep is mind is knowledge of your planting zone. My zone is 7B. Here is a planting zone map that is very specific in helping you find out what zone you are in.


It's also important to know when the last frost is because you can't begin planting outdoors until the last frost has past. Victory Seeds has a helpful chart that you can use to help find your last frost date also. Also remember it takes 6-7 weeks to grow container seedlings so now is the time to get started on those seedlings!


There's a lot of research yet to be done, but I'm hoping my garden will be a place for me to relax, spend time outdoors, and possibly have a sitting area that I can just reflect with a cup of tea and watch the plants grow in the early morning hours.... or enjoy an evening watching fireflies dance.  


Off to read a few vintage seed catalogs~ 


Angela

Monday, February 7, 2011

Sewing & Upcoming Project Goals...

I've been thinking a lot on my last post. (Great thoughts can come in the middle of the night!) and I've put together a list of objectives or goals that I'd like to accomplish throughout my project. Here's just a few:


  1. To plant a fruit and vegetable garden
  2. Refrain from buying new clothing for 1 year (sew, thrift, vintage shops, ok) My only exception to this rule is undergarments. I refuse to buy used.... ew.
  3. Volunteer more often.
  4. Build my homemaking skills with gradual lifelong routines.
  5. Teach my daughters (9 & 4) age appropriate basic sewing and cooking skills.
  6. Come up with a reasonable daily schedule that incorporates housekeeping, beauty routines, me time, volunteer time, party time, etc.
  7. Cook from vintage cookbooks and explore the variety
  8. Blog consistently on my progress
  9. Obtain a beauty regime routine
  10. Continue exploring, learning and researching about the 30s, 40's, 50's.
  11. Review vintage movies on Friday's
  12. Incorporate the positive aspects of vintage living into a modern lifestyle
  13. Learn how to do old Hollywood hairstyles
Previously, I blogged about how much my great-grandmother was a real inspiration to me. So today, I thought... what fun it would be to start my journey the same year that she was my age! So, since I'm going to turn 30-something this year, I decided to use that age... which makes it the round figure year of 1940!

So my research will begin in 1940.... and, not being perfect, my journey shall begin starting the 1st of March. I'm not exactly sure how long it will last... I'm hoping at least a year.

Of course to start my journey I'm going to need a few clothes... so I want to get busy sewing. The pattern I've chosen is from 1954, but I'll get closer to my time frame in my next design. This is just a simple short sleeve shirt:

I plan to make it like Version 3 with a bit shorter sleeve but with a full button front like Version 2. I figure since I'm using this as a general around the house work shirt, I can test the waters with my sewing skills again.

Here's a picture of my sewing room.... waiting to be used. (Sorry, the pic is a bit darker than I would like since it's a night shot, but hay... no one's perfect, right?! Besides, I usually find myself working here in the wee hours of the night anyway!) It's also a hard room to take a photo of because it's a loft, so I was sorta leaning over the steps... ekkk....


Here's a few funny clips from "I Love Lucy"... The first one is Lucy's attempt at sewing a dress in order to save money on the budget.... very, very funny!


I could really relate to this next video.... Lucy and Ethel decide to explore the past and try living like it's the 1900's! 


Sure makes me wish I had a "vintage friend" that lived close by.... it would be more fun with an Ethel around, LOL!

Hope you enjoyed the clips!

~Angela


Friday, February 4, 2011

Perfectionism & Growth

“Perfection is attained by slow degrees; it requires the hand of time” - Voltaire


Ok, I admit it. I am a perfectionist. I don't claim that as always being a positive thing. To me it can equal one of two things... A.) It excels me to levels that make me unbelievably proud to B) never starting things because of a general fear that it won't be "perfect"... which can lead a lot of things left undone. This I am certainly *not* proud of!

My blog is just an example. See, I have these ideas in my head how each post must be, and because I want it "just right", I skip a night, then another, then another waiting to get everything "perfect". It's true that I think of vintage living 24/7 now and I am implementing small actions into my life... it's just I'm not able to live the lifestyle (in my mind) because I don't have the "things" to live it perfectly. I love to read "My 50's Year" blog, and she tends to reflect on her "modern life" verse her "vintage life". That said, I think the 2011 me is thinking in modern times... I want it instantly. I want a magic fairy to just pop down, wave her wand, and give me a vintage wardrobe, with a vintage haircut (that I automatically know how to style, of course!), I'd love a fully clean and organized home so that I can just implement the daily routines and just whisk around all day on cloud 9. I want to blog about this magical lifestyle that I've just instantly created. Only thing is, there is no magic fairy. I'm a mom to 4 kids, so tossing out my jeans and t-shirt wardrobe and heading out to vintage shops in Atlanta and spending til the closet is full again just ain't gonna happen. (yes, I know I said ain't!.... cuz it ain't!) lol! In order for me to obtain a wardrobe of my desires, it means I have to spend time at my sewing machine. It means that it will take spring and summer weekends at various thrift stores, antique markets, and yard sales in hopes to find a piece I like, at a price I like. It will most certainly take time. Ah, time.... society, in general, really doesn't like anything that takes TIME anymore.... we live in such an instant "microwaveable" society that we haven't got patience to do anything slowly. Yesterday I was on facebook, and I kept seeing post after post about who was getting the brand new i-phone that was just released hours before. That's how we are now. When something comes out, we have to INSTANTLY have it. If we don't have funds to pay for it instantly, we look to the gold card... oh wait, it's gone platinum now. Ah, yes.... Titanium V.I.P. Exclusive Cards are next, I'm sure of it. Of course if we actually saved up the cash to buy anything it would be obsolete as soon as we had the funds... but it's not just technology, it's about whatever we want. We want it... and we want it now. Our advertising today focuses on that "greed" of society.... here's just a few of today's commercials...


or how about this credit card commercial....


Ah, yes... Chase what matters.... and what matters is that you get whatever you want.... NOW! It really makes us sound like a generation of spoiled little brats, now doesn't it? What if we went without?? I'm sure we'd probably stop our feet, stick out that bottom lip and pout about how "life isn't fair".  I'd like to say that I'm not apart of this generational curse we all seem to be under, but I'd be lying. If there is ever something I really and truly want, I can always somehow manipulate the budget to "fit it in" and then worry about it later. This is an aspect of myself that I would like to change as my project moves forward.

I have been continually thinking about my project, and yes, I realize that the magic vintage fairy isn't about to wave her little wand and make me the vintage diva instantly. My inner spoiled brat is still pouting that there isn't a real vintage fairy to begin with... *sigh* So it's time for me to really tap into my inner vintage self. To dig deep past the "I want it all, and I want it now" mentality... so I've spent many fond hours recently thinking of my great grandmother. I was blessed to have known her for 18 years of my life. She lived next door to me and I grew up basically at her feet. As I read various blogs about others who are living vintage lifestyles whether it be 30's, 40's, or 50's, they will talk about how things used to be done, and it will trigger a thought of "OH! So THAT'S why my grandma did that!".... and it makes me appreciate knowing her more. Now that I am getting so mentally involved with my project, I wish that I had a chance to ask her so many questions about the lifestyle of the 1930's-40's... I wonder what her view of the depression era was like or what about WWII... in which she lost her first husband. Up until she was able she used to keep a very large garden and grew all kinds of vegetables. In the yard my grandfather had planted various fruit trees, which gradually over the years have succumb to rot and have been cut down. My grandmother used to can tomatoes, beets, pickles, and strawberry jam. She always loved doing it... and the kitchen was always a bustle while canning was going on! I can remember being shooed out of the kitchen more than once out of fear that a boil or pop from the pan would land on me. Those are happy memories for me, because I can picture the white counters and appliances, the bright yellow paint color, and all of the old enamel pans, linens and well, it simply felt cozy and wonderful. Maybe that is why I am so drawn to vintage living... simplicity. Bright. Cheerful... and a determination that if it needed to be done, we will just simply get it done... and it will be done with a smile and in love. If there is someone for me to look up to in my vintage journey, it really is my great-grandma. Recently, my mom gave me my grandmother's old jewelry box. Inside there was a  newspaper clipping to a berry farm advertisement (she loved strawberry jam... ate it nearly every morning on toast!) but there was another clipping that read:


"Someone has said that there are four kinds of 'BONES' in every organization."
"There are the WISHBONES, who spend their time wishing someone else would do all the work."
"There are the JAWBONES who do all the talking, but very little else"
"Next, there are the KNUCKLEBONES, who knock everything anyone ever tries to do"
"And finally, there are the BACKBONES, who get under the load and do the work."

My grandma was definitely a backbone! I want to be a backbone too! So what does all this mean? Well, it means that I'm going to have to grow... and like a seed, it's going to take time. If I just blogged about my perfect vintage life, I wouldn't be able to share with you how I grew to get at that point... and honestly, isn't sharing the bumps and bruises of growing how we learn from each other? So I'm not perfect (gasp!). It's true... honestly, I'm not even close to it, but I had someone in my life who I can look up to. Someone who, although they weren't perfect either, lived a lifestyle of giving to others in love. Someone who wasn't afraid to get under the load and work! I knew my grandmother in her later years (60's-80's), but I can imagine she was probably a very hands on, get it done kind of mamma!  After all, she was a single mom while her husband was in the war. I imagine that she was one of those women who were fighting the war on the homefront... planting her victory garden and harvesting! Doing what she could do at home to help out the efforts.

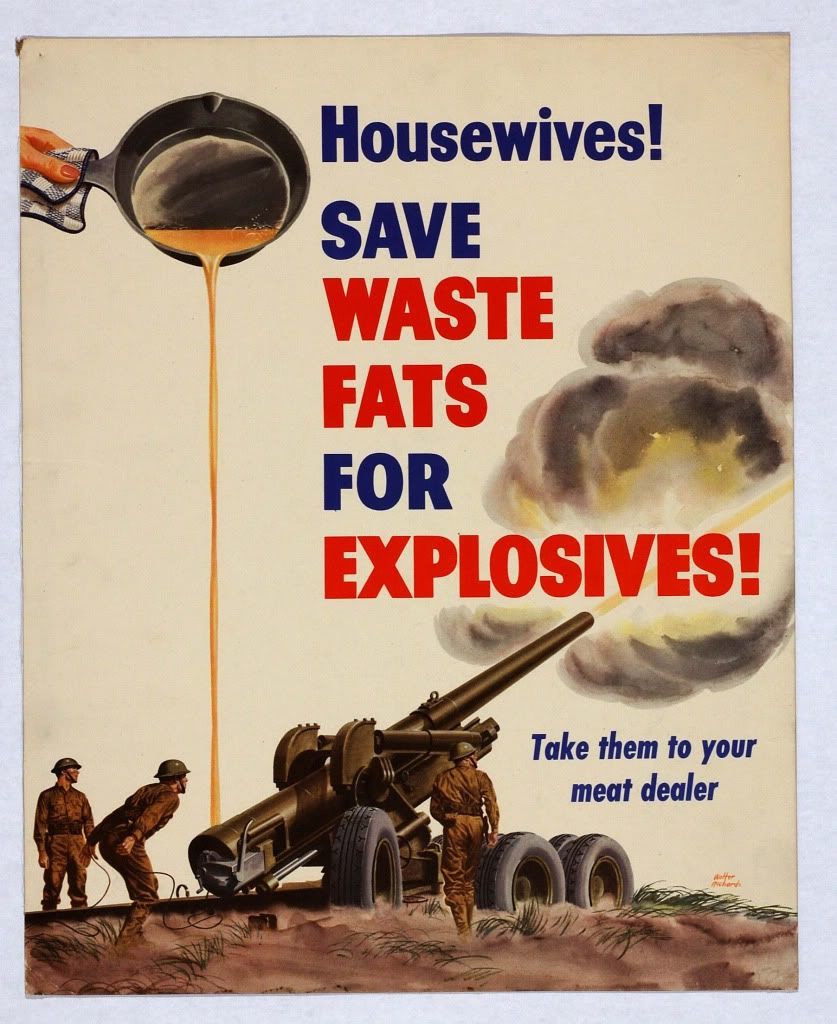
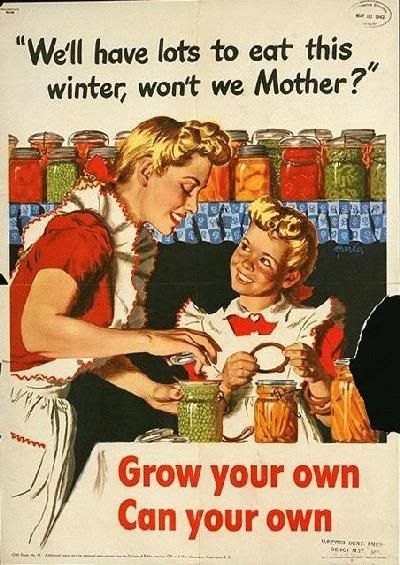
The type of advertising my grandmother was seeing would have been WWII posters like:


The advertising wasn't focused on "me, me, me"... but rather, "What can I do to help?", doing without, and rather then thinking of the here and now, focusing on the future... and preparing today for tomorrow.

Do we do that today? Do we actively save for our retirements to live comfortably (on a continually falling dollar), or are we squandering it on the latest iphone just to please our own inner spoiled brats? Are we focused on helping our neighbors? Do we even know our neighbors? Do we volunteer or is our time to wrapped up in being "too busy" doing something for ourselves, or our kids. These are questions I ask myself. Uncomfortably, sometimes I don't like the answers I give myself. I can continue to push down and ignore the inner brat in me, but honestly, I'd rather deal with it because in the end, I really think it's time to grow and become a better person. There is a me I'm striving to be, and no, there isn't a vintage fairy who will magically change me, but rather this will be a slow, gradual change.... a lifestyle change. I quoted Voltaire at the beginning of my blog, “Perfection is attained by slow degrees; it requires the hand of time”. This is truly my thoughts this evening. I plan to take time to blog, even if it isn't a "perfect" post, just to gather thoughts, motivate myself, track my journey, and who knows, maybe inspire one or two people along the way. =)

Tomorrow I will share with you how I've been cleaning out my hall closet as well as my sewing room, and show you my first vintage pattern I'm working on.

Til then~
Angela


Friday, January 28, 2011

Dating Vintage Sewing Patterns

If you love vintage style then most likely you own a few vintage wardrobe pieces. Over the years many of these vintage pieces have gotten moth holes, faded, or the fabric has become fragile. In some cases this can add to it's charm and it can become "shabby chic", but if your looking for just "chic" then be prepared to shell out some cash or if your handy with the sewing machine (why, yes, I am!) then you can do the vintage thing and just whip yourself up a lovely frock or two!

There are benefits to sewing your own clothing! Here are just a few good reasons:
  • We all know what colors look good on us so we can choose the fabrics that best suit our complexions. Vintage styles can also have an updated, fresh look with new fabrics. 
  • By premaking a pattern using inexpensive muslin, you can adjust the fit so that the outfit fits you like a glove!
  • Making new clothing from vintage patterns means you can easily wash and wear what you make without fear of it falling apart. Great for everyday wear!
  • Making a piece of clothing from vintage patterns will give you the same time of experience that someone from that era would have had! (It can be an experience, because many older patterns come unprinted!)
  • Exploring vintage patterns will further your knowledge of the fashions of that era.
Personally as I've begun exploring vintage fashions, I've found that I am most attracted to styles from the 1940's. That's not to say I wouldn't mind making a couple June Cleaver type dresses, but mainly my personality and what I am used to wearing is more figure flattering for the 1940's. I'd really love to find a 1940's military style dress pattern with a hat. What fun that would be to make!

Dating old sewing patterns isn't as easy as just looking on the pattern envelope... although thankfully in the later years most companies did decide on printing the year on the envelope. When dating a sewing pattern that does not have a year on the envelope, you'll want to consider a few things:
  • Look at the Price of the Pattern
  • Look at the character drawings
  • Look at the style of the fashion
  • Sizing of the pattern
  • Pattern Envelope Changes
The one thing you CAN NOT use to date a pattern is... the pattern number. Companies reissue patterns using the same numbers so this won't be very helpful.

For my research, I'm going to share how to date patterns ranging from the 1930's-1970's. From the 80's on the dates are pretty well established on sewing patterns.

  • Butterick was the very first home sewing pattern company started in 1863.
  • Vogue Patterns began in 1899 through mail order only, but didn't take off to be the Vogue we know today until 1916 when they were sold in department stores. Vogue patterns did not begin dating patterns until the 1970's.
  • Simplicity Sewing Patterns began in 1927 and began dating their patterns in the 1940's. In 1940 they dated the pattern envelope on the bottom front and then in the later 40's you'll find the date on the back side of the instruction sheet.
  • DuBerry Patterns were Woodward's Store brand patterns produced by Simplicity. The original prices ran from 10-15 cents.
  • McCall began business in 1870. You can usually dates their patterns on the bottom in fine print or behind the back flap of the envelope. In 1951 McCall added an "s" to their name so they we're known as McCall's. They were also the first to print on the paper pattern pieces.
  • Hollywood Patterns date between the 1930's- early 1950's.
  • Advance Patterns were designed for JCPenny from 1933-1966. Original prices started at 10 cents and went up to 75 cents.
  • Mail order patterns became popular in the 1940's and designs were featured in various woman's magazines with a coupon that could be cut out and sent in. There were various companies that offered these patterns, but some of the most popular were Anne Adams, Sue Burnett, and Marian Martin.

The Price of Patterns

The price of a pattern then, like today, would vary based upon an elaborate pattern verse a normal pattern. Printed patterns (pattern pieces with printed edges) were more expensive than unprinted patterns. (With unprinted patterns you match notches and cutouts together).Keeping that in mind, you can still get a rough idea of the era based upon price and then use further assessments to narrow it down father.

15 cent patterns were usually unprinted "common" patterns. 
25 cent patterns that were printed were more detailed and elaborate patterns.
35 cent patterns were generally around in the mid-late 1950's. Many children's styled patterns remained this price as the adult size patterns increased in price.
40 cents Butterick had NEW DELTA patterns in the 30's that were this pricey!
45 cent pattens include later 1960's Advance patterns
50 cent patterns were in the 1950's. Early 1950's elaborate patterns, such as coats, suit sets etc. were 50 cents, while in the late 50's this became common price for all patterns. Early 60's kept this price and children's patterns remained this price for awhile in the 60's.
60 cent patterns were 1960's
$1.00 patterns are generally late 60's into the 70's.
$1.25-$1.50 patterns started in the mid 1970's (huge price jumps in comparison to the earlier years!)
$2.00 patterns were seen at the end of the 70's.
$2.50-$3.75 patterns were seen into the early-mid 80's
$4.25 patterns were seen in the mid 80's as well

From then on, I'm guessing our grandma's couldn't imagine patterns costing so much (or maybe it was the invention of the "barcode

The Character Drawings & Fashion Sense

In the 1930's character sketches on the pattern featured very faded faces and just really an 'idea image' that it was an actual person. 1930's fashions featured feminine, flowing dresses. Many styles were cut on the bias to mold to your figure. Hemlines in fashion go down with the dollar (don't know why, it just has played out that way... conservative nature I guess) so when the 30's depression came, down went the hemlines all the way to the ankle where they remained until the end of the 1930's. During the depression era women began to sew more now than ever before. Clothing was mended time and time again before just being tossed to the wayside. Children's garments were sewn with the idea of passing them down to younger family members.

Anne Adams Pattern #1787


In the 1940's character sketches were more detailed, but generally the pattern envelopes were only printed in 2-3 colors in the early-mid 40's. Later 40's introduced more color to the envelope. The character featured generally had small pointy lips, defined small facial features, her hair was curled under or tightly coiffed. Fashion sense in the 1940's was all based upon the war. The US government was rationing items such as cloth, rubber, and metal so the fashion industry had to adapt. The government also put restrictions on how much yardage could be put into a piece of clothing. The only fashionable items that were not under restriction were wedding gowns and infant clothing. Dressing for the occasion was key. Because we were all in support of our troops in the war, we put the effort in on the home front as well. Some women took over the factory jobs that the men held previously, thus companies (and sewing patterns!) began to create "coveralls". Rosie the Riveter was born. If you took to the farming fields, women found that denim trousers were a must. It became acceptable for women to wear these things if they were doing such dirty jobs. Colors for everyday wear tended to be muted colors and brighter (for the time period) colors were reserved for Sunday services or evening wear. Many times characters were depicted doing something to show you what the outfit was designed for. An example of that would be a house dress... it was shown with a model with a broom in her hand. Clothing designed for going out in would have the character wearing gloves with her purse and possibly a hat.


Simplicity Pattern# 3782 


Simplicity Pattern # 1459


In the 1950's characters were in full Technicolor glory! Lots of vibrant colors. Models were still sketched out.  Hairstyles were generally a lot more "fluffy" rather than the tight, sleek look of the 40's. An hourglass figure was achieved by wearing foundation garments. Once the war was over the government released restrictions on fashion and in a rebellious nature Christian Dior created the bell dress which required wearing a petticoat underneath to help fill out the bottom half of the dress. A tiny waist was achieved by the use of girdles. Many of his runway designs used up to 5 yards of fabric in the skirt alone! In contrast, Chanel didn't care for Dior's New Look, and reinvented her designs to a more boxy suit jacket and slim pencil skirts. Givenchy followed suit with more slimming designs and A-lines that soon blossomed heavily in the 1960's.

McCall's Pattern # 9244
Indicative to the Christian Dior "NEW LOOK" of the era

Vogue Couturier Design Pattern #859
Inspired by Chanel's slimming look.


In the 1960's patterns mostly stuck with character drawings, but began to photograph live models wearing the clothing. The 60's era began much like the end of the 1950's, but very quickly began to take on a new style with the new first lady, Jacqueline Kennedy Onassis. Jackie's style was influenced by French couture and tended to be fitted, great lines, a very classic, timeless fashion sense. The mid-60's gave way to British Mod Fashions. Clothing became looser, more casual and the need for foundation garments had gone to the wayside. Clothing became brighter and more geometric. The late 60's gave way to the hippy fashion movement. Bell bottoms, jeans, fringe and flowers were all popular to the younger generation and continued to move into the 70's.

Simplicity Pattern #4768
Very Jackie O in style!


The British attacked with the 60's Mod Style
Simplicity Pattern #6973

Hippie Style. This Simplicity Pattern # 9374 is actually a pattern from 1971, as finding sewing patterns styled for "hippie"/bo-ho clothing weren't readily available in the 60's. I believe this is due to the fact that the "hippie" or hipster movement was designed to move away from the traditional and the younger generation didn't want to sew like their parents had. What crafting that took place in that scene was a more "free spirit", sew without a pattern/ create your own look idea. Embellishing ready made items were also popular in this scene. Painting on jeans and t-shirts (or heck, just skin!) was popular... adding beads and fringe to items became a way to express yourself.

Sizing of Pattern and how we've GROWN over the years

In the very beginning of home sewing patterns just a bust size was given. In the 1940's a bust AND hip measurement were given, but a waist measurement was NOT given because it was assumed that the sewer was experienced and able to change that part of the pattern to fit their need.

Up until 1956 a size 12 meant a bust size of 30. From 1956 on, a size 12 bust increased to 32". In 1967 they changed it again and a size 12 meant a bust of 34" and so it stands today.

While the bust measurement grew, so did the hip and waist measurements! Darn!

Pattern Envelope Changes

Just as today, graphic designers changed around the fonts and logo's. Here's a few dating tips for some of the major pattern companies:

Simplicity:
  • The 1930's was when Simplicity began to use color on their pattern envelopes. Previously, it had just been a brown printed paper envelope. The early 30's envelopes were small, but in 1934 they increased the size of the envelope to the standard we still see today. In 1941 the graphic font changed, and the logo down the side of the pattern went from grey to black with yellow writing. In 1944 Simplicity Printed Patterns font changed so that the word PRINTED was in red. In 1951, Simplicity added two black bars above the price of the pattern, which then changed in 1953 to ONE black bar. In 1957 they added one red line one inch from the left hand side of the pattern. 
Vogue
  • In the 1930's Vogue Patterns were in brown envelopes with the words VOGUE PATTERN in the upper left hand corner. In 1950 Vogue Patterns was moved to the right hand side of the envelope. Vogue Junior patterns were offered from 1945-1959.

If you have found a love of vintage sewing patterns, I have a couple of sites I'd like to recommend you check out:

Sewing Pattern Review : Just as the name implies, this is site reviews sewing patterns both new and vintage! Readers showcase how the pattern turned out for them and any tips or suggestions. Great to check out before you begin your next project!

Vintage Sewing Patterns On Loan : Accumulating patterns can get to be addictive (and expensive depending upon the type of pattern your looking for!) This website offers reproduction vintage patterns as well as complete originals. You can either buy them individually or get 4 free patterns a year by joining a membership ($25 fee). You can also earn free patterns by submitting a review of one of their patterns.

Fashion Era : Pick an era, any era! This site has all the fashion history you can imagine! I spend hours here. I love it!

And don't forget to Google "Vintage Pattern Reviews".... I love reading about other's adventures with old patterns! If you've got a blog and have tackled a vintage sewing pattern or two, please share!!

Speaking of hours and hours and blogs, I've spent hours here, so I think I'll end here, and hopefully you gained a little information, and PLEASE, if I've missed something, let me know... we're all here to learn!

Happy Sewing!
Angela

Tuesday, January 25, 2011

Progress... Slow and Steady CAN win the race...

Wow, blogging? Yeah, I've been bad about it. Basically, there just hasn't been any time at all to do it with the Christmas holiday rush and then Atlanta has quite the winter weather with snow and ice! The kids have been out of school for the last month and frankly, driving me nuts, LOL! In the summer we always have outdoor activities to do, but in the winter, my warm blooded children just like to stay inside and nit-pick at each other. But alas, in the chaos I have been making progress towards my modern technicolor lifestyle. Slow and steady progress will win the race!

Beauty Progress

I finally got the haircut I've been promising myself! I took this picture of Betty Grable into my stylist:
I absolutely love this classic style! I didn't go blond, rather I went dark, so I'm excited to be able to play with it and see how close I can get to coming up with this amazing Victory Roll style. I've also been spending time watching some YouTube video's on 1940's hairstyles. They are really fun to watch and helpful too!

Beauty Routine's were very important in times past. I'm still trying to figure out when is the best time of day for me to implement my routine, and I think I'll be splitting it up between a quick A.M. face cleaning then makeup for the day and then doing the majority of the routine (rolling hair, facials, etc.) during the evening hours. One problem I think today's woman has is learning that it is OK to take time for yourself! We have become martyrs and want to serve everyone else and then there is nothing left for ourselves. My pastor did a wonderful presentation one time that sticks in my head. Using a pitcher of water poured water into various glasses...he said that if we give and give and give eventually we will have nothing left. We need to take time at the well and gather up more water. I know I still need to put this into practice. One day at a time.

I did find an awesome link to creating your own fabric hair rollers! I got a chance to make the rollers but haven't tried them out yet. I made mine in a cute light blue cherry pattern and red check print. The only problem I had with making these was the step where you gather the stitches after stuffing. I set the gather stitch too far apart and it didn't really want to gather an 1" of material, so be sure to set your gather stitch to a small setting, or do what I did and simply wrap and tie the ends off. It made for the same look, but I'm sure gathering would have been easier. Like I said, I haven't tried them out yet, but I'll let you know how it works out!

Throughout my vintage beauty research, I've come across a few products that I'm in the process of testing out. Here's what I'm using... have you used these products? How have they worked for you?

Jergen's Cold Cream- In my 50's magazines there were ads for Jergen's Cold Cream, and since it's a lot cheaper than Pond's, I thought I would try it. In the meantime, I did hit up Pond's and ask them for a coupon because I would like to try their product, however it is nearly double the price of Jergen's and you get half the amount?! The most effective way to use cold cream is to leave it on your face for at least 5 minutes or more. My evening routine will consist of putting on my cold cream before wrapping my hair and once my hair is complete, then remove the cream. 

Teeth Whitening- I've always wanted to test out those Crest Whitening Strips, but again with being close to $30 a box, I've just never found that spare $30 to "test" a product with. I plan on wearing red lipstick so my teeth have to be white. I've recently gone to the dentist and gotten a cleaning... which should always be step number one. Then my next step? Baking soda and Peroxide! Yep... cheap, and everyone says it works instantly! You simply take a bit of baking soda, add enough peroxide DILUTED WITH WATER to make a paste then brush your teeth with it making sure to brush for at least 2 minutes. I'm sure it taste horrible but I'll rinse well and use Listerine afterwards. Now, one warning I read was  that it can remove dental glue (yikes!) so I'll brush gently around 2 areas of my mouth. Next, don't do this more than once a month. Baking soda is an abrasive and can actually wear the enamel off your teeth, so for me, I'll do this once and then stick to buying the Baking Soda & Peroxide Toothpaste and use that for daily use. Colgate has a newsletter that you can sign up for and get special coupons online.

Home Front

While I was getting my hair done I was flipping through a magazine when I came across this ad for the new Desperate Housewives season:

Personally, I've never seen the show, but um.... I have seen that vacuum before! Eva Longoria is holding MY vacuum... a 1957 Kirby 517. I've spent the last month cleaning her up and replacing some standard parts like the belts, light, and then buffing the metal to shine just as pretty as this picture! Ah, my dark hair, red lips, and Kirby vacuum... now if I could snag that dress please Ms. Longoria.... 

I also had the chance to attend an estate auction in North Caroloina and I am the proud new owner of a few boxes of vintage patterns! Most are from the 60's, 70's and 80's but I did score a handful of 50's patterns. I'll be selling the others on etsy so if those are your era's, please check out my listings!

So, with that being said, I'm off to tackle some pin curls and face cream! ;) Now that life is normal again, I really hope to be posting a lot more! 

Smiles =)
Angela


Sunday, January 2, 2011

New Year ~ New Schedule

It's been a busy season for sure! The holidays are now over, and throughout it all I have still been preparing for my challenge of living a modern day 1950's lifestyle. One of the most important things I needed to do was to have a schedule put in place. I've used other scheduling techniques in the past and some work better than others. This time around I am combining my modern day "FlyLady" approach with my vintage homemaking books to come up with a through schedule I believe will be kept.

The Good Housekeeping Housekeeping Book (1947) talks about a housekeeping calendar, "The home that runs smoothly and happily is one that is run by a plan or schedule, consciously or unconsciously. A schedule calling for a rigid hour by hour discharge of duties can never be applied to housework because it is difficult to meet and too discouraging."

The Woman's Home Companion Household Book (1948) says, "A cleaning schedule is a highly personalized matter, depending upon the size of the home and family, family habits, the age of the house, the amount of dirt in the neighborhood and many other factors." I know this to be true for a fact, because you can ask any Georgian about red clay dirt, and they'll have stories to tell! It stains like you wouldn't believe!!

It is true that a cleaning schedule is a highly personalized matter, but when you don't know where to begin, you feel a bit lost. At least that is how I felt a few years ago before I read the book, Sidetracked Home Executives (2001). My hard core, nitty griddy schedule comes from this book.


I'm going to walk you through how I got my schedule. To make a schedule box like mine you'll need the following items:

* One index card file box (I use a market found 1950's recipe box!)
* Colored index cards with at least 4 different colors
* Index Card Dividers- minimum of 43 dividers
* Pen
* 1 small yearly calendar that can be put on the inside top of your index card file box
* Clear Tape

Step 1: Tape your small calendar on the top of your index card file box. You can find a small yearly calendar either printable on the internet or checkbook register. Many times they print small yearly calendars that fit perfectly.

Step 2: Get 31 of the index card dividers and label each one, 1 through 31. One for each day of the month. Put them in your file box.

Step 3: Label the last four: Jan-Dec. One for each month. File these BEHIND your daily dividers.

Step 4: Separate your index cards into at least 4 different colors. One color will be "DAILY", one color will be "WEEKLY", one color will be "MONTHLY", and one color will be "SEASONALLY". You can use additional colors if you wish to divide chores into "Bi-Monthly", etc.

Step 5: This is the hardest part of schedule making, but once you do it, you only have to do it once no matter how many times you revise your schedule. Ready? Grab a sheet of paper and write down ALL the chores that need to be done. The best way I found to do this was to spend a few moments in every room. Don't just write down what you normally do, take time to write down things like scrubbing the baseboards, vacuuming the vents, turning your mattress, etc. Things you normally don't think of but possibly one time a year! The home books I listed above are also great references to remind you of things that you might overlook. Do your best here, and remember... if you forget something NO BIG DEAL.... it's index cards, simply add it once you remember it.

Step 6: Decide if the chore must be done Daily, Weekly, Bi-weekly (if you have cards for this), Monthly, or Seasonally. Again, depending upon your family type, you may have to vacuum the house once a week, but a large family of six has to vacuum daily! Fit the chore to your lifestyle.

Step 7: Once you have decided what chores need to be done and when, your ready to transfer them to an index card. Here is an example of how one of my cards look:

So, at the top I write how often the chore takes place. (Again, this will correlate with the index card color you've chosen for your weekly chores) Then I wrote Thurs, but don't worry about doing this yet! Then I write on the right hand side how long the chore should take. Underneath, I write the chore. Followed by a description of HOW to do the chore. Now, do *I* need to write down how to do the chore because I tend to be that forgetful? Nope. I write it down so that when I delegate this chore to someone else in the house THEY know how to do it. You might want to even write down WHERE to find the supplies they need. Explicit directions here will help you down the road when you encounter the person in your house that doesn't know how to do something!

lol! But... on the bright side, if I only have 2 days of my week that I have these jobs then I have 5 days that I'm not dealing with that drudging nagging feeling of "I should be doing this...." It's really not bad either when you look at the card and say, "ok.... this job just takes me 20 minutes to do. In 20 minutes it will be over!" Then I usually time myself and try to beat 20 minutes so it sort of makes a game out of it. Not that it makes me desire to do it anymore, but some rays of sunshine are better than none.

Not all of your cards will have days that they need to be done. That's good because then these cards can be inserted on various days of light cleaning.

Step 9: All of my old housekeeping books designated a day to do things, i.e. Monday- wash day, Tuesday- ironing, etc. Labeling your days is still a very good idea and also frees your mind up knowing that everything is scheduled.... so schedule your FREE TIME or time you want to do things! My personal days of the week look like this:

Sun- Spiritual Day. Time to spend with the family. Only daily chores/basics need to be done.
Mon- Laundry Day. I still make this laundry day and with six people, it's generally an all day event. Nevertheless it isn't the back breaking work it used to be, so while the machine washes clothes, I can be doing other light cleaning jobs, quick errands, etc. Great day to plan weekly schedules, meals, etc.
Tues- Moderate Cleaning Day. Cleaning for 2-4 hours.
Wed- Specific jobs day... means I can sew, or schedule things that I want to get done. Mainly for me, that's various crafting projects.
Thurs- Heavy Cleaning Day. Cleaning for 4-6 hours.
Fri- Errand Day. Market Day. Light jobs.
Sat- Family Fun Day. This is a requirement for us especially with little ones in various sporting events. Saturday's are usually busy with these events.

Step 10: Time to File! Check your days on your card. If you do your grocery shopping on Friday like I do, then you'll see when you get paid next, and then file that card BEHIND that date (example Friday the 7th), you'd file the card behind index divider #7. If Tuesday the 4th is your moderate cleaning day, take all your Tuesday cards and put them BEHIND card #4. Once your done with the cards you've assigned days to, check out the cards that are left. Divide the chores up between your light cleaning days and if they are monthly chores be sure to spread them out over the month. I try my best to keep Wednesday's as my time to sew and craft, so I'd rather do one or two extra things on a Monday or Friday then have to do them on a Wednesday.

Check out your seasonal cards. Some of mine include things like: Fertilize the Yard, Clean out the fireplace, Plant annual flowers, Steam Clean Carpet, etc. Obviously these are seasonal things and I sure wouldn't plant annuals in Dec! So, I'd take the "plant annual flowers" card and place it BEHIND the month of April. Now, again, things like this depend on what area of the country you live in. You certainly don't want to be planting annuals until all possibility of frost has gone for your area. Same with cleaning out the fireplace. I'll clean mine out for the season sometime in March... if you live in the northeast, you may not do it until April! Either way, file your seasonal cards behind the month that it needs to be done. This is also a great reminder if you have a vegetable/fruit garden to know when to plant things for your area.

Another idea, if you would like another color for index cards, you can include things like family and friends birthdays! Simply write down the person and date of birth. You can also keep handy information like favorite colors, sizes of clothing, and other things they like on this card. At the end of every month you will grab the following months cards and file them ONE WEEK (or more if you need to!) before they're birthday. This will give you time to shop for presents or send a card. As you can see from this example, this system can be expanded upon in numerous ways. Keeping track of chores, gardening, birthdays.... wow!

HOW TO USE THE SYSTEM


Using the system is easy. I wake up in the morning go to my box and take out all the cards behind TODAY'S date. Instantly there is my to-do list!

Now, no one is perfect and there WILL BE days when you don't get everything done. According to the SHE Book, you can do one of two things.... 1.- Reschedule it! If it's super important and it must get done then file it to be done on the next possible day. 2.- Forget it! Really? Yep, really. If it's something that can be moved to next week or heck, next month... then forget about it and just move it to a later time (or month!) Just be sure not to keep bumping that same chore over and over again, else it really won't ever get done! ;)

I've made up a "monthly" card and put it 4-5 days before the end of the month that reads: PREPARE FOR NEXT MONTH. So, say it's January, around January 27th-28th, I'll pull out any cards behind the month of February and file those and make sure no birthday's are Feb. 1st!

Hopefully I've explained my system here in a very basic, understandable way. You can always add more to this system. If you follow the FlyLady you can add in your Morning and Bedtime routines. You can add additional dividers and use them for "zones", "daily missions", and more! When you come across a vintage household tip that really works in a certain cleaning situation, be sure to write it down on that particular chore card so next time you'll remember!

I do highly recommend if this system seems like one you would like to follow to read "Sidetracked Home Executives" by Pam Young and Peggy Jones. It's an easy, fun read and they add menu cards and jobs for kids and more. I simply shared with you the parts of my system that I have tailored to meet my families needs. I've added my own bits along the way.

So, this is my schedule. I'm actually very excited to have it completed and I feel ready to tackle the new year! This year is the first time I'll also be using an online family calendar called cozi. Since this is the first time I'm using it and am just starting I don't have as much to say about this program except that it is designed to inform the family of everyone's events, it's a helpful menu assistant, and the best thing is, it's accessible to all family members to schedule information on.

I hope you have a wonderfully organized, blessed new year!

Smiles,
Angela